Line 1
We import what we need for rapid development! A carefully-curated set of
FastHTML functions and other Python objects is brought into our global
namespace for convenience.
Line 3
We instantiate a FastHTML app with the `fast_app()` utility function.
This provides a number of really useful defaults that we’ll take
advantage of later in the tutorial.
Line 5
We use the `rt()` decorator to tell FastHTML what to return when a user
visits `/` in their browser.
Line 6
We connect this route to HTTP GET requests by defining a view function
called `get()`.
Line 7
A tree of Python function calls that return all the HTML required to
write a properly formed web page. You’ll soon see the power of this
approach.
Line 9
The [`serve()`](https://www.fastht.ml/docs/api/core.html#serve) utility
configures and runs FastHTML using a library called `uvicorn`.
Run the code:
``` bash
python main.py
```
The terminal will look like this:
``` bash
INFO: Uvicorn running on http://0.0.0.0:5001 (Press CTRL+C to quit)
INFO: Started reloader process [58058] using WatchFiles
INFO: Started server process [58060]
INFO: Waiting for application startup.
INFO: Application startup complete.
```
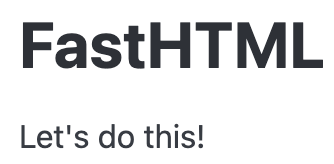
Confirm FastHTML is running by opening your web browser to
[127.0.0.1:5001](http://127.0.0.1:5001). You should see something like
the image below:
> **Note**
>
> While some linters and developers will complain about the wildcard
> import, it is by design here and perfectly safe. FastHTML is very
> deliberate about the objects it exports in `fasthtml.common`. If it
> bothers you, you can import the objects you need individually, though
> it will make the code more verbose and less readable.
>
> If you want to learn more about how FastHTML handles imports, we cover
> that
> [here](https://www.fastht.ml/docs/explains/faq.html#why-use-import).
## A Minimal Charting Application
The [`Script`](https://www.fastht.ml/docs/api/xtend.html#script)
function allows you to include JavaScript. You can use Python to
generate parts of your JS or JSON like this:
``` python
import json
from fasthtml.common import *
app, rt = fast_app(hdrs=(Script(src="https://cdn.plot.ly/plotly-2.32.0.min.js"),))
data = json.dumps({
"data": [{"x": [1, 2, 3, 4],"type": "scatter"},
{"x": [1, 2, 3, 4],"y": [16, 5, 11, 9],"type": "scatter"}],
"title": "Plotly chart in FastHTML ",
"description": "This is a demo dashboard",
"type": "scatter"
})
@rt("/")
def get():
return Titled("Chart Demo", Div(id="myDiv"),
Script(f"var data = {data}; Plotly.newPlot('myDiv', data);"))
serve()
```
## Debug Mode
When we can’t figure out a bug in FastHTML, we can run it in `DEBUG`
mode. When an error is thrown, the error screen is displayed in the
browser. This error setting should never be used in a deployed app.
``` python
from fasthtml.common import *
app, rt = fast_app(debug=True)
@rt("/")
def get():
1/0
return Titled("FastHTML Error!", P("Let's error!"))
serve()
```
Line 3
`debug=True` sets debug mode on.
Line 7
Python throws an error when it tries to divide an integer by zero.
## Routing
FastHTML builds upon FastAPI’s friendly decorator pattern for specifying
URLs, with extra features:
Line 5
The “/” URL on line 5 is the home of a project. This would be accessed
at [127.0.0.1:5001](http://127.0.0.1:5001).
Line 9
“/hello” URL on line 9 will be found by the project if the user visits
[127.0.0.1:5001/hello](http://127.0.0.1:5001/hello).
> **Tip**
>
> It looks like `get()` is being defined twice, but that’s not the case.
> Each function decorated with `rt` is totally separate, and is injected
> into the router. We’re not calling them in the module’s namespace
> (`locals()`). Rather, we’re loading them into the routing mechanism
> using the `rt` decorator.
You can do more! Read on to learn what we can do to make parts of the
URL dynamic.
## Variables in URLs
You can add variable sections to a URL by marking them with
`{variable_name}`. Your function then receives the `{variable_name}` as
a keyword argument, but only if it is the correct type. Here’s an
example:
Line 5
We specify two variable names, `name` and `age`.
Line 6
We define two function arguments named identically to the variables. You
will note that we specify the Python types to be passed.
Line 7
We use these functions in our project.
Try it out by going to this address:
[127.0.0.1:5001/uma/5](http://127.0.0.1:5001/uma/5). You should get a
page that says,
> “Hello Uma, age 5”.
### What happens if we enter incorrect data?
The [127.0.0.1:5001/uma/5](http://127.0.0.1:5001/uma/5) URL works
because `5` is an integer. If we enter something that is not, such as
[127.0.0.1:5001/uma/five](http://127.0.0.1:5001/uma/five), then FastHTML
will return an error instead of a web page.
> **FastHTML URL routing supports more complex types**
>
> The two examples we provide here use Python’s built-in `str` and `int`
> types, but you can use your own types, including more complex ones
> such as those defined by libraries like
> [attrs](https://pypi.org/project/attrs/),
> [pydantic](https://pypi.org/project/pydantic/), and even
> [sqlmodel](https://pypi.org/project/sqlmodel/).
## HTTP Methods
FastHTML matches function names to HTTP methods. So far the URL routes
we’ve defined have been for HTTP GET methods, the most common method for
web pages.
Form submissions often are sent as HTTP POST. When dealing with more
dynamic web page designs, also known as Single Page Apps (SPA for
short), the need can arise for other methods such as HTTP PUT and HTTP
DELETE. The way FastHTML handles this is by changing the function name.
Line 6
On line 6 because the `get()` function name is used, this will handle
HTTP GETs going to the `/` URI.
Line 10
On line 10 because the
[`post()`](https://www.fastht.ml/docs/explains/stripe.html#post)
function name is used, this will handle HTTP POSTs going to the `/` URI.
## CSS Files and Inline Styles
Here we modify default headers to demonstrate how to use the [Sakura CSS
microframework](https://github.com/oxalorg/sakura) instead of FastHTML’s
default of Pico CSS.
Line 4
By setting `pico` to `False`, FastHTML will not include `pico.min.css`.
Line 7
This will generate an HTML `` tag for sourcing the css for Sakura.
Line 8
If you want an inline styles, the
[`Style()`](https://www.fastht.ml/docs/api/xtend.html#style) function
will put the result into the HTML.
## Other Static Media File Locations
As you saw, [`Script`](https://www.fastht.ml/docs/api/xtend.html#script)
and `Link` are specific to the most common static media use cases in web
apps: including JavaScript, CSS, and images. But it also works with
videos and other static media files. The default behavior is to look for
these files in the root directory - typically we don’t do anything
special to include them. We can change the default directory that is
looked in for files by adding the `static_path` parameter to the
`fast_app` function.
``` python
app, rt = fast_app(static_path='public')
```
FastHTML also allows us to define a route that uses `FileResponse` to
serve the file at a specified path. This is useful for serving images,
videos, and other media files from a different directory without having
to change the paths of many files. So if we move the directory
containing the media files, we only need to change the path in one
place. In the example below, we call images from a directory called
`public`.
``` python
@rt("/{fname:path}.{ext:static}")
async def get(fname:str, ext:str):
return FileResponse(f'public/{fname}.{ext}')
```
## Rendering Markdown
``` python
from fasthtml.common import *
hdrs = (MarkdownJS(), HighlightJS(langs=['python', 'javascript', 'html', 'css']), )
app, rt = fast_app(hdrs=hdrs)
content = """
Here are some _markdown_ elements.
- This is a list item
- This is another list item
- And this is a third list item
**Fenced code blocks work here.**
"""
@rt('/')
def get(req):
return Titled("Markdown rendering example", Div(content,cls="marked"))
serve()
```
## Code highlighting
Here’s how to highlight code without any markdown configuration.
``` python
from fasthtml.common import *
# Add the HighlightJS built-in header
hdrs = (HighlightJS(langs=['python', 'javascript', 'html', 'css']),)
app, rt = fast_app(hdrs=hdrs)
code_example = """
import datetime
import time
for i in range(10):
print(f"{datetime.datetime.now()}")
time.sleep(1)
"""
@rt('/')
def get(req):
return Titled("Markdown rendering example",
Div(
# The code example needs to be surrounded by
# Pre & Code elements
Pre(Code(code_example))
))
serve()
```
## Defining new `ft` components
We can build our own `ft` components and combine them with other
components. The simplest method is defining them as a function.
``` python
from fasthtml.common import *
```
``` python
def hero(title, statement):
return Div(H1(title),P(statement), cls="hero")
# usage example
Main(
hero("Hello World", "This is a hero statement")
)
```
``` html
Hello World
This is a hero statement
```
### Pass through components
For when we need to define a new component that allows zero-to-many
components to be nested within them, we lean on Python’s `*args` and
`**kwargs` mechanism. Useful for creating page layout controls.
``` python
def layout(*args, **kwargs):
"""Dashboard layout for all our dashboard views"""
return Main(
H1("Dashboard"),
Div(*args, **kwargs),
cls="dashboard",
)
# usage example
layout(
Ul(*[Li(o) for o in range(3)]),
P("Some content", cls="description"),
)
```
``` html
Dashboard
0
1
2
Some content
```
### Dataclasses as ft components
While functions are easy to read, for more complex components some might
find it easier to use a dataclass.
``` python
from dataclasses import dataclass
@dataclass
class Hero:
title: str
statement: str
def __ft__(self):
""" The __ft__ method renders the dataclass at runtime."""
return Div(H1(self.title),P(self.statement), cls="hero")
# usage example
Main(
Hero("Hello World", "This is a hero statement")
)
```
``` html
Hello World
This is a hero statement
```
## Testing views in notebooks
Because of the ASGI event loop it is currently impossible to run
FastHTML inside a notebook. However, we can still test the output of our
views. To do this, we leverage Starlette, an ASGI toolkit that FastHTML
uses.
``` python
# First we instantiate our app, in this case we remove the
# default headers to reduce the size of the output.
app, rt = fast_app(default_hdrs=False)
# Setting up the Starlette test client
from starlette.testclient import TestClient
client = TestClient(app)
# Usage example
@rt("/")
def get():
return Titled("FastHTML is awesome",
P("The fastest way to create web apps in Python"))
print(client.get("/").text)
```
FastHTML is awesome
FastHTML is awesome
The fastest way to create web apps in Python
## Forms
To validate data coming from users, first define a dataclass
representing the data you want to check. Here’s an example representing
a signup form.
``` python
from dataclasses import dataclass
@dataclass
class Profile: email:str; phone:str; age:int
```
Create an FT component representing an empty version of that form. Don’t
pass in any value to fill the form, that gets handled later.
``` python
profile_form = Form(method="post", action="/profile")(
Fieldset(
Label('Email', Input(name="email")),
Label("Phone", Input(name="phone")),
Label("Age", Input(name="age")),
),
Button("Save", type="submit"),
)
profile_form
```
``` html
```
Once the dataclass and form function are completed, we can add data to
the form. To do that, instantiate the profile dataclass:
``` python
profile = Profile(email='john@example.com', phone='123456789', age=5)
profile
```
Profile(email='john@example.com', phone='123456789', age=5)
Then add that data to the `profile_form` using FastHTML’s
[`fill_form`](https://www.fastht.ml/docs/api/components.html#fill_form)
class:
``` python
fill_form(profile_form, profile)
```
``` html
```
### Forms with views
The usefulness of FastHTML forms becomes more apparent when they are
combined with FastHTML views. We’ll show how this works by using the
test client from above. First, let’s create a SQlite database:
``` python
db = database("profiles.db")
profiles = db.create(Profile, pk="email")
```
Now we insert a record into the database:
``` python
profiles.insert(profile)
```
Profile(email='john@example.com', phone='123456789', age=5)
And we can then demonstrate in the code that form is filled and
displayed to the user.
``` python
@rt("/profile/{email}")
def profile(email:str):
profile = profiles[email]
filled_profile_form = fill_form(profile_form, profile)
return Titled(f'Profile for {profile.email}', filled_profile_form)
print(client.get(f"/profile/john@example.com").text)
```
Line 3
Fetch the profile using the profile table’s `email` primary key
Line 4
Fill the form for display.
Profile for john@example.com
Profile for john@example.com
And now let’s demonstrate making a change to the data.
``` python
@rt("/profile")
def post(profile: Profile):
profiles.update(profile)
return RedirectResponse(url=f"/profile/{profile.email}")
new_data = dict(email='john@example.com', phone='7654321', age=25)
print(client.post("/profile", data=new_data).text)
```
Line 2
We use the `Profile` dataclass definition to set the type for the
incoming `profile` content. This validates the field types for the
incoming data
Line 3
Taking our validated data, we updated the profiles table
Line 4
We redirect the user back to their profile view
Line 7
The display is of the profile form view showing the changes in data.
Profile for john@example.com
Profile for john@example.com
## Strings and conversion order
The general rules for rendering are: - `__ft__` method will be called
(for default components like `P`, `H2`, etc. or if you define your own
components) - If you pass a string, it will be escaped - On other python
objects, `str()` will be called
As a consequence, if you want to include plain HTML tags directly into
e.g. a `Div()` they will get escaped by default (as a security measure
to avoid code injections). This can be avoided by using `NotStr()`, a
convenient way to reuse python code that returns already HTML. If you
use pandas, you can use `pandas.DataFrame.to_html()` to get a nice
table. To include the output a FastHTML, wrap it in `NotStr()`, like
`Div(NotStr(df.to_html()))`.
Above we saw how a dataclass behaves with the `__ft__` method defined.
On a plain dataclass, `str()` will be called (but not escaped).
``` python
from dataclasses import dataclass
@dataclass
class Hero:
title: str
statement: str
# rendering the dataclass with the default method
Main(
Hero("
Hello World
", "This is a hero statement")
)
```
``` html
Hero(title='
Hello World
', statement='This is a hero statement')
```
``` python
# This will display the HTML as text on your page
Div("Let's include some HTML here:
Some HTML
")
```
``` html
Let's include some HTML here: <div>Some HTML</div>
```
``` python
# Keep the string untouched, will be rendered on the page
Div(NotStr("
Some HTML
"))
```
``` html
Some HTML
```
## Custom exception handlers
FastHTML allows customization of exception handlers, but does so
gracefully. What this means is by default it includes all the ``
tags needed to display attractive content. Try it out!
``` python
from fasthtml.common import *
def not_found(req, exc): return Titled("404: I don't exist!")
exception_handlers = {404: not_found}
app, rt = fast_app(exception_handlers=exception_handlers)
@rt('/')
def get():
return (Titled("Home page", P(A(href="/oops")("Click to generate 404 error"))))
serve()
```
We can also use lambda to make things more terse:
``` python
from fasthtml.common import *
exception_handlers={
404: lambda req, exc: Titled("404: I don't exist!"),
418: lambda req, exc: Titled("418: I'm a teapot!")
}
app, rt = fast_app(exception_handlers=exception_handlers)
@rt('/')
def get():
return (Titled("Home page", P(A(href="/oops")("Click to generate 404 error"))))
serve()
```
## Cookies
We can set cookies using the
[`cookie()`](https://www.fastht.ml/docs/api/core.html#cookie) function.
In our example, we’ll create a `timestamp` cookie.
``` python
from datetime import datetime
from IPython.display import HTML
```
``` python
@rt("/settimestamp")
def get(req):
now = datetime.now()
return P(f'Set to {now}'), cookie('now', datetime.now())
HTML(client.get('/settimestamp').text)
```
FastHTML page
Set to 2024-09-26 15:33:48.141869
Now let’s get it back using the same name for our parameter as the
cookie name.
``` python
@rt('/gettimestamp')
def get(now:parsed_date): return f'Cookie was set at time {now.time()}'
client.get('/gettimestamp').text
```
'Cookie was set at time 15:33:48.141903'
## Sessions
For convenience and security, FastHTML has a mechanism for storing small
amounts of data in the user’s browser. We can do this by adding a
`session` argument to routes. FastHTML sessions are Python dictionaries,
and we can leverage to our benefit. The example below shows how to
concisely set and get sessions.
``` python
@rt('/adder/{num}')
def get(session, num: int):
session.setdefault('sum', 0)
session['sum'] = session.get('sum') + num
return Response(f'The sum is {session["sum"]}.')
```
## Toasts (also known as Messages)
Toasts, sometimes called “Messages” are small notifications usually in
colored boxes used to notify users that something has happened. Toasts
can be of four types:
- info
- success
- warning
- error
Examples toasts might include:
- “Payment accepted”
- “Data submitted”
- “Request approved”
Toasts require the use of the `setup_toasts()` function plus every view
needs these two features:
- The session argument
- Must return FT components
``` python
setup_toasts(app)
@rt('/toasting')
def get(session):
# Normally one toast is enough, this allows us to see
# different toast types in action.
add_toast(session, f"Toast is being cooked", "info")
add_toast(session, f"Toast is ready", "success")
add_toast(session, f"Toast is getting a bit crispy", "warning")
add_toast(session, f"Toast is burning!", "error")
return Titled("I like toast")
```
Line 1
`setup_toasts` is a helper function that adds toast dependencies.
Usually this would be declared right after `fast_app()`
Line 4
Toasts require sessions
Line 11
Views with Toasts must return FT or FtResponse components.
💡 `setup_toasts` takes a `duration` input that allows you to specify
how long a toast will be visible before disappearing. For example
`setup_toasts(duration=5)` sets the toasts duration to 5 seconds. By
default toasts disappear after 10 seconds.
⚠️ Toasts don’t work with SPA like navigation that replaces the entire
body such as this navigation trigger
`A('About', hx_get="/about", hx_swap="outerHTML", hx_push_url="true", hx_target="body")`.
As an alternative, wrap the content of your route in an element
containing an id and set this id as the target for your navigation
trigger (i.e. `hx_target='#container_id'`).
## Authentication and authorization
In FastHTML the tasks of authentication and authorization are handled
with Beforeware. Beforeware are functions that run before the route
handler is called. They are useful for global tasks like ensuring users
are authenticated or have permissions to access a view.
First, we write a function that accepts a request and session arguments:
``` python
# Status code 303 is a redirect that can change POST to GET,
# so it's appropriate for a login page.
login_redir = RedirectResponse('/login', status_code=303)
def user_auth_before(req, sess):
# The `auth` key in the request scope is automatically provided
# to any handler which requests it, and can not be injected
# by the user using query params, cookies, etc, so it should
# be secure to use.
auth = req.scope['auth'] = sess.get('auth', None)
# If the session key is not there, it redirects to the login page.
if not auth: return login_redir
```
Now we pass our `user_auth_before` function as the first argument into a
[`Beforeware`](https://www.fastht.ml/docs/api/core.html#beforeware)
class. We also pass a list of regular expressions to the `skip`
argument, designed to allow users to still get to the home and login
pages.
``` python
beforeware = Beforeware(
user_auth_before,
skip=[r'/favicon\.ico', r'/static/.*', r'.*\.css', r'.*\.js', '/login', '/']
)
app, rt = fast_app(before=beforeware)
```
## Server-sent events (SSE)
With [server-sent
events](https://developer.mozilla.org/en-US/docs/Web/API/Server-sent_events),
it’s possible for a server to send new data to a web page at any time,
by pushing messages to the web page. Unlike WebSockets, SSE can only go
in one direction: server to client. SSE is also part of the HTTP
specification unlike WebSockets which uses its own specification.
FastHTML introduces several tools for working with SSE which are covered
in the example below. While concise, there’s a lot going on in this
function so we’ve annotated it quite a bit.
``` python
import random
from asyncio import sleep
from fasthtml.common import *
hdrs=(Script(src="https://unpkg.com/htmx-ext-sse@2.2.1/sse.js"),)
app,rt = fast_app(hdrs=hdrs)
@rt
def index():
return Titled("SSE Random Number Generator",
P("Generate pairs of random numbers, as the list grows scroll downwards."),
Div(hx_ext="sse",
sse_connect="/number-stream",
hx_swap="beforeend show:bottom",
sse_swap="message"))
shutdown_event = signal_shutdown()
async def number_generator():
while not shutdown_event.is_set():
data = Article(random.randint(1, 100))
yield sse_message(data)
await sleep(1)
@rt("/number-stream")
async def get(): return EventStream(number_generator())
```
Line 5
Import the HTMX SSE extension
Line 12
Tell HTMX to load the SSE extension
Line 13
Look at the `/number-stream` endpoint for SSE content
Line 14
When new items come in from the SSE endpoint, add them at the end of the
current content within the div. If they go beyond the screen, scroll
downwards
Line 15
Specify the name of the event. FastHTML’s default event name is
“message”. Only change if you have more than one call to SSE endpoints
within a view
Line 17
Set up the asyncio event loop
Line 19
Don’t forget to make this an `async` function!
Line 20
Iterate through the asyncio event loop
Line 22
We yield the data. Data ideally should be comprised of FT components as
that plugs nicely into HTMX in the browser
Line 26
The endpoint view needs to be an async function that returns a
[`EventStream`](https://www.fastht.ml/docs/api/core.html#eventstream)
## Websockets
With websockets we can have bi-directional communications between a
browser and client. Websockets are useful for things like chat and
certain types of games. While websockets can be used for single
direction messages from the server (i.e. telling users that a process is
finished), that task is arguably better suited for SSE.
FastHTML provides useful tools for adding websockets to your pages.
``` python
from fasthtml.common import *
from asyncio import sleep
app, rt = fast_app(exts='ws')
def mk_inp(): return Input(id='msg', autofocus=True)
@rt('/')
async def get(request):
cts = Div(
Div(id='notifications'),
Form(mk_inp(), id='form', ws_send=True),
hx_ext='ws', ws_connect='/ws')
return Titled('Websocket Test', cts)
async def on_connect(send):
print('Connected!')
await send(Div('Hello, you have connected', id="notifications"))
async def on_disconnect(ws):
print('Disconnected!')
@app.ws('/ws', conn=on_connect, disconn=on_disconnect)
async def ws(msg:str, send):
await send(Div('Hello ' + msg, id="notifications"))
await sleep(2)
return Div('Goodbye ' + msg, id="notifications"), mk_inp()
```
Line 4
To use websockets in FastHTML, you must instantiate the app with `exts`
set to ‘ws’
Line 6
As we want to use websockets to reset the form, we define the `mk_input`
function that can be called from multiple locations
Line 12
We create the form and mark it with the `ws_send` attribute, which is
documented here in the [HTMX websocket
specification](https://v1.htmx.org/extensions/web-sockets/). This tells
HTMX to send a message to the nearest websocket based on the trigger for
the form element, which for forms is pressing the `enter` key, an action
considered to be a form submission
Line 13
This is where the HTMX extension is loaded (`hx_ext='ws'`) and the
nearest websocket is defined (`ws_connect='/ws'`)
Line 16
When a websocket first connects we can optionally have it call a
function that accepts a `send` argument. The `send` argument will push a
message to the browser.
Line 18
Here we use the `send` function that was passed into the `on_connect`
function to send a `Div` with an `id` of `notifications` that HTMX
assigns to the element in the page that already has an `id` of
`notifications`
Line 20
When a websocket disconnects we can call a function which takes no
arguments. Typically the role of this function is to notify the server
to take an action. In this case, we print a simple message to the
console
Line 23
We use the `app.ws` decorator to mark that `/ws` is the route for our
websocket. We also pass in the two optional `conn` and `disconn`
parameters to this decorator. As a fun experiment, remove the `conn` and
`disconn` arguments and see what happens
Line 24
Define the `ws` function as async. This is necessary for ASGI to be able
to serve websockets. The function accepts two arguments, a `msg` that is
user input from the browser, and a `send` function for pushing data back
to the browser
Line 25
The `send` function is used here to send HTML back to the page. As the
HTML has an `id` of `notifications`, HTMX will overwrite what is already
on the page with the same ID
Line 27
The websocket function can also be used to return a value. In this case,
it is a tuple of two HTML elements. HTMX will take the elements and
replace them where appropriate. As both have `id` specified
(`notifications` and `msg` respectively), they will replace their
predecessor on the page.
## File Uploads
A common task in web development is uploading files. The examples below
are for uploading files to the hosting server, with information about
the uploaded file presented to the user.
> **File uploads in production can be dangerous**
>
> File uploads can be the target of abuse, accidental or intentional.
> That means users may attempt to upload files that are too large or
> present a security risk. This is especially of concern for public
> facing apps. File upload security is outside the scope of this
> tutorial, for now we suggest reading the [OWASP File Upload Cheat
> Sheet](https://cheatsheetseries.owasp.org/cheatsheets/File_Upload_Cheat_Sheet.html).
### Single File Uploads
``` python
from fasthtml.common import *
from pathlib import Path
app, rt = fast_app()
upload_dir = Path("filez")
upload_dir.mkdir(exist_ok=True)
@rt('/')
def get():
return Titled("File Upload Demo",
Article(
Form(hx_post=upload, hx_target="#result-one")(
Input(type="file", name="file"),
Button("Upload", type="submit", cls='secondary'),
),
Div(id="result-one")
)
)
def FileMetaDataCard(file):
return Article(
Header(H3(file.filename)),
Ul(
Li('Size: ', file.size),
Li('Content Type: ', file.content_type),
Li('Headers: ', file.headers),
)
)
@rt
async def upload(file: UploadFile):
card = FileMetaDataCard(file)
filebuffer = await file.read()
(upload_dir / file.filename).write_bytes(filebuffer)
return card
serve()
```
Line 13
Every form rendered with the
[`Form`](https://www.fastht.ml/docs/api/xtend.html#form) FT component
defaults to `enctype="multipart/form-data"`
Line 14
Don’t forget to set the `Input` FT Component’s type to `file`
Line 32
The upload view should receive a [Starlette
UploadFile](https://www.starlette.io/requests/#request-files) type. You
can add other form variables
Line 33
We can access the metadata of the card (filename, size, content_type,
headers), a quick and safe process. We set that to the card variable
Line 34
In order to access the contents contained within a file we use the
`await` method to read() it. As files may be quite large or contain bad
data, this is a seperate step from accessing metadata
Line 35
This step shows how to use Python’s built-in
[`pathlib.Path`](https://docs.python.org/3/library/pathlib.html#pathlib.Path)
library to write the file to disk.
### Multiple File Uploads
``` python
from fasthtml.common import *
from pathlib import Path
app, rt = fast_app()
upload_dir = Path("filez")
upload_dir.mkdir(exist_ok=True)
@rt('/')
def get():
return Titled("Multiple File Upload Demo",
Article(
Form(hx_post=upload_many, hx_target="#result-many")(
Input(type="file", name="files", multiple=True),
Button("Upload", type="submit", cls='secondary'),
),
Div(id="result-many")
)
)
def FileMetaDataCard(file):
return Article(
Header(H3(file.filename)),
Ul(
Li('Size: ', file.size),
Li('Content Type: ', file.content_type),
Li('Headers: ', file.headers),
)
)
@rt
async def upload_many(files: list[UploadFile]):
cards = []
for file in files:
cards.append(FileMetaDataCard(file))
filebuffer = await file.read()
(upload_dir / file.filename).write_bytes(filebuffer)
return cards
serve()
```
Line 13
Every form rendered with the
[`Form`](https://www.fastht.ml/docs/api/xtend.html#form) FT component
defaults to `enctype="multipart/form-data"`
Line 14
Don’t forget to set the `Input` FT Component’s type to `file` and assign
the multiple attribute to `True`
Line 32
The upload view should receive a `list` containing the [Starlette
UploadFile](https://www.starlette.io/requests/#request-files) type. You
can add other form variables
Line 34
Iterate through the files
Line 35
We can access the metadata of the card (filename, size, content_type,
headers), a quick and safe process. We add that to the cards variable
Line 36
In order to access the contents contained within a file we use the
`await` method to read() it. As files may be quite large or contain bad
data, this is a seperate step from accessing metadata
Line 37
This step shows how to use Python’s built-in
[`pathlib.Path`](https://docs.python.org/3/library/pathlib.html#pathlib.Path)
library to write the file to disk.