File size: 15,429 Bytes
c254ac1 |
1 2 3 4 5 6 7 8 9 10 11 12 13 14 15 16 17 18 19 20 21 22 23 24 25 26 27 28 29 30 31 32 33 34 35 36 37 38 39 40 41 42 43 44 45 46 47 48 49 50 51 52 53 54 55 56 57 58 59 60 61 62 63 64 65 66 67 68 69 70 71 72 73 74 75 76 77 78 79 80 81 82 83 84 85 86 87 88 89 90 91 92 93 94 95 96 97 98 99 100 101 102 103 104 105 106 107 108 109 110 111 112 113 114 115 116 117 118 119 120 121 122 123 124 125 126 127 128 129 130 131 132 133 134 135 136 137 138 139 140 141 142 143 144 145 146 147 148 149 150 151 152 153 154 155 156 157 158 159 160 161 162 163 164 165 166 167 168 169 170 171 172 173 174 175 176 177 178 179 180 181 182 183 184 185 186 187 188 189 190 191 192 193 194 195 196 197 198 199 200 201 202 203 204 205 206 207 208 209 210 211 212 213 214 215 216 217 218 219 220 221 222 223 224 225 226 227 228 229 230 231 232 233 234 235 236 237 238 239 240 241 242 243 244 245 246 247 248 249 250 251 252 253 254 255 256 257 258 259 260 261 262 263 264 265 266 267 268 269 270 271 272 273 274 275 276 277 278 279 280 281 282 283 284 285 286 287 288 289 290 291 292 293 294 295 296 297 298 299 300 301 302 303 304 305 306 307 308 309 310 311 312 313 314 315 316 317 318 319 320 321 322 323 324 325 326 |
---
comments: true
description: A concise guide on isolating segmented objects using Ultralytics.
keywords: Ultralytics, YOLO, segmentation, Python, object detection, inference, dataset, prediction, instance segmentation, contours, binary mask, object mask, image processing
---
# Isolating Segmentation Objects
After performing the [Segment Task](../tasks/segment.md), it's sometimes desirable to extract the isolated objects from the inference results. This guide provides a generic recipe on how to accomplish this using the Ultralytics [Predict Mode](../modes/predict.md).
<p align="center">
<img src="https://github.com/ultralytics/ultralytics/assets/62214284/1787d76b-ad5f-43f9-a39c-d45c9157f38a" alt="Example Isolated Object Segmentation">
</p>
## Recipe Walk Through
1. Begin with the necessary imports
```python
from pathlib import Path
import cv2
import numpy as np
from ultralytics import YOLO
```
???+ tip "Ultralytics Install"
See the Ultralytics [Quickstart](../quickstart.md/#install-ultralytics) Installation section for a quick walkthrough on installing the required libraries.
***
2. Load a model and run `predict()` method on a source.
```python
from ultralytics import YOLO
# Load a model
model = YOLO('yolov8n-seg.pt')
# Run inference
results = model.predict()
```
!!! question "No Prediction Arguments?"
Without specifying a source, the example images from the library will be used:
```
'ultralytics/assets/bus.jpg'
'ultralytics/assets/zidane.jpg'
```
This is helpful for rapid testing with the `predict()` method.
For additional information about Segmentation Models, visit the [Segment Task](../tasks/segment.md#models) page. To learn more about `predict()` method, see [Predict Mode](../modes/predict.md) section of the Documentation.
***
3. Now iterate over the results and the contours. For workflows that want to save an image to file, the source image `base-name` and the detection `class-label` are retrieved for later use (optional).
```{ .py .annotate }
# (2) Iterate detection results (helpful for multiple images)
for r in res:
img = np.copy(r.orig_img)
img_name = Path(r.path).stem # source image base-name
# Iterate each object contour (multiple detections)
for ci,c in enumerate(r):
# (1) Get detection class name
label = c.names[c.boxes.cls.tolist().pop()]
```
1. To learn more about working with detection results, see [Boxes Section for Predict Mode](../modes/predict.md#boxes).
2. To learn more about `predict()` results see [Working with Results for Predict Mode](../modes/predict.md#working-with-results)
??? info "For-Loop"
A single image will only iterate the first loop once. A single image with only a single detection will iterate each loop _only_ once.
***
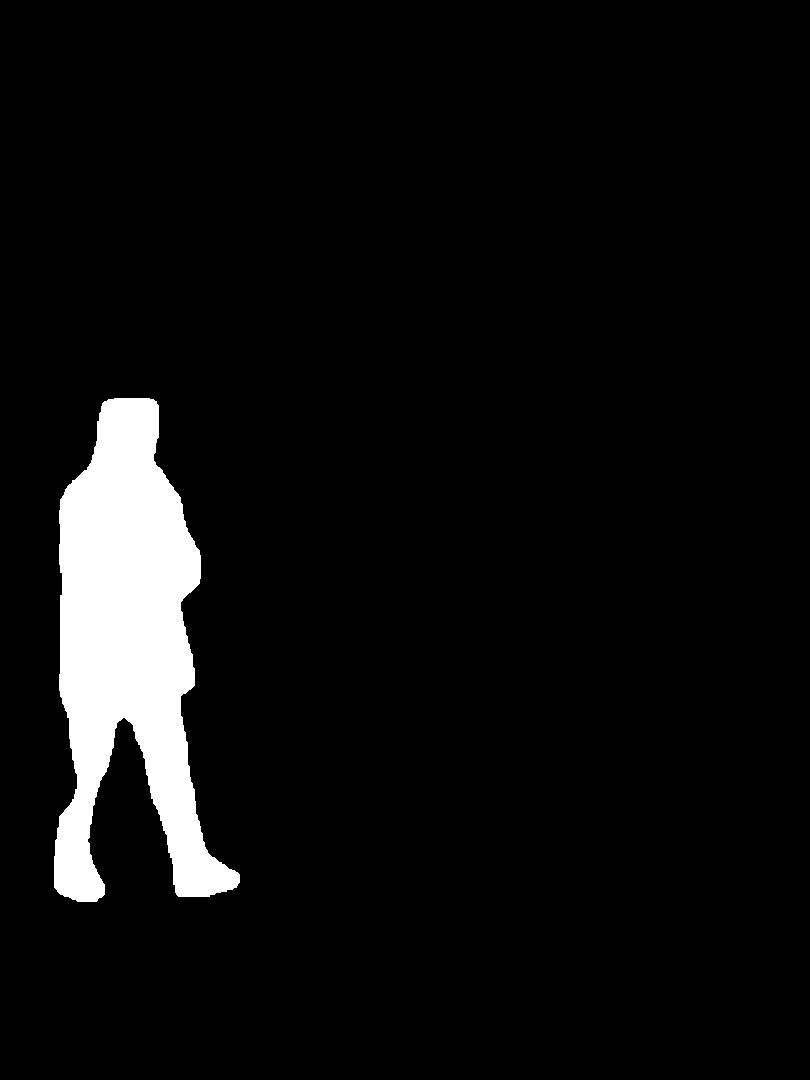
4. Start with generating a binary mask from the source image and then draw a filled contour onto the mask. This will allow the object to be isolated from the other parts of the image. An example from `bus.jpg` for one of the detected `person` class objects is shown on the right.
{ width="240", align="right" }
```{ .py .annotate }
# Create binary mask
b_mask = np.zeros(img.shape[:2], np.uint8)
# (1) Extract contour result
contour = c.masks.xy.pop()
# (2) Changing the type
contour = contour.astype(np.int32)
# (3) Reshaping
contour = contour.reshape(-1, 1, 2)
# Draw contour onto mask
_ = cv2.drawContours(b_mask,
[contour],
-1,
(255, 255, 255),
cv2.FILLED)
```
1. For more info on `c.masks.xy` see [Masks Section from Predict Mode](../modes/predict.md#masks).
2. Here, the values are cast into `np.int32` for compatibility with `drawContours()` function from OpenCV.
3. The OpenCV `drawContours()` function expects contours to have a shape of `[N, 1, 2]` expand section below for more details.
<details>
<summary> Expand to understand what is happening when defining the <code>contour</code> variable.</summary>
<p>
- `c.masks.xy` :: Provides the coordinates of the mask contour points in the format `(x, y)`. For more details, refer to the [Masks Section from Predict Mode](../modes/predict.md#masks).
- `.pop()` :: As `masks.xy` is a list containing a single element, this element is extracted using the `pop()` method.
- `.astype(np.int32)` :: Using `masks.xy` will return with a data type of `float32`, but this won't be compatible with the OpenCV `drawContours()` function, so this will change the data type to `int32` for compatibility.
- `.reshape(-1, 1, 2)` :: Reformats the data into the required shape of `[N, 1, 2]` where `N` is the number of contour points, with each point represented by a single entry `1`, and the entry is composed of `2` values. The `-1` denotes that the number of values along this dimension is flexible.
</details>
<p></p>
<details>
<summary> Expand for an explanation of the <code>drawContours()</code> configuration.</summary>
<p>
- Encapsulating the `contour` variable within square brackets, `[contour]`, was found to effectively generate the desired contour mask during testing.
- The value `-1` specified for the `drawContours()` parameter instructs the function to draw all contours present in the image.
- The `tuple` `(255, 255, 255)` represents the color white, which is the desired color for drawing the contour in this binary mask.
- The addition of `cv2.FILLED` will color all pixels enclosed by the contour boundary the same, in this case, all enclosed pixels will be white.
- See [OpenCV Documentation on `drawContours()`](https://docs.opencv.org/4.8.0/d6/d6e/group__imgproc__draw.html#ga746c0625f1781f1ffc9056259103edbc) for more information.
</details>
<p></p>
***
5. Next the there are 2 options for how to move forward with the image from this point and a subsequent option for each.
### Object Isolation Options
!!! example ""
=== "Black Background Pixels"
```py
# Create 3-channel mask
mask3ch = cv2.cvtColor(b_mask, cv2.COLOR_GRAY2BGR)
# Isolate object with binary mask
isolated = cv2.bitwise_and(mask3ch, img)
```
??? question "How does this work?"
- First, the binary mask is first converted from a single-channel image to a three-channel image. This conversion is necessary for the subsequent step where the mask and the original image are combined. Both images must have the same number of channels to be compatible with the blending operation.
- The original image and the three-channel binary mask are merged using the OpenCV function `bitwise_and()`. This operation retains <u>only</u> pixel values that are greater than zero `(> 0)` from both images. Since the mask pixels are greater than zero `(> 0)` <u>only</u> within the contour region, the pixels remaining from the original image are those that overlap with the contour.
### Isolate with Black Pixels: Sub-options
??? info "Full-size Image"
There are no additional steps required if keeping full size image.
<figure markdown>
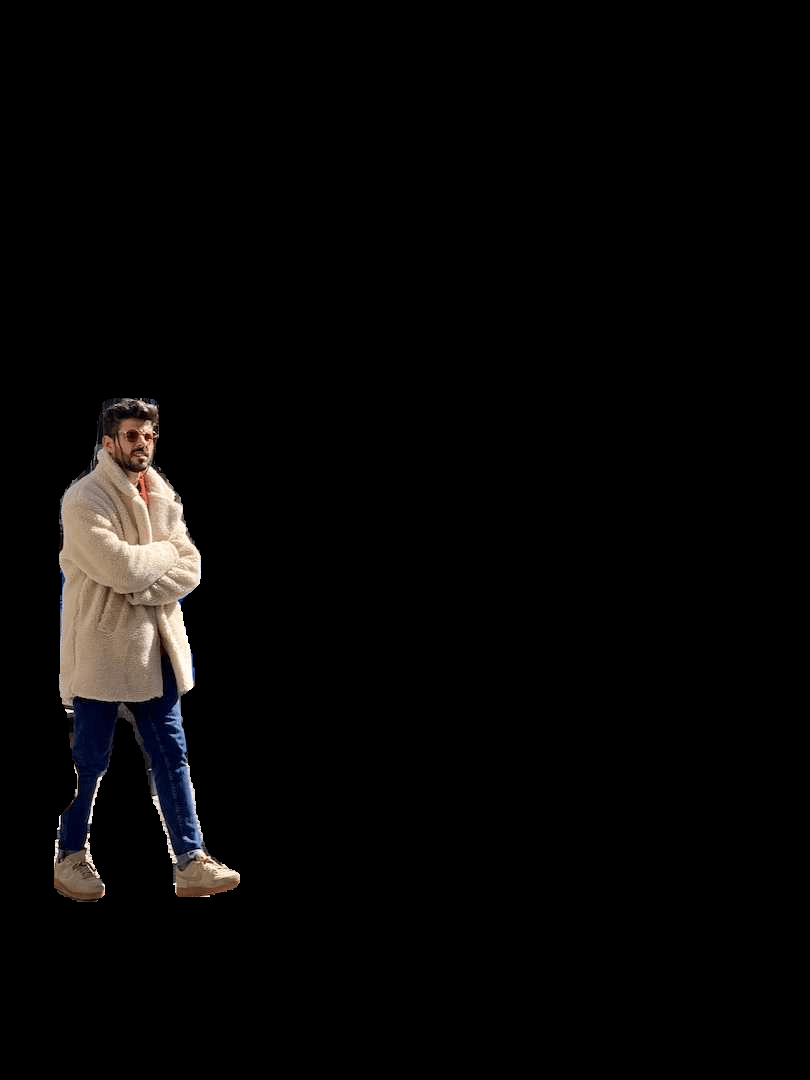{ width=240 }
<figcaption>Example full-size output</figcaption>
</figure>
??? info "Cropped object Image"
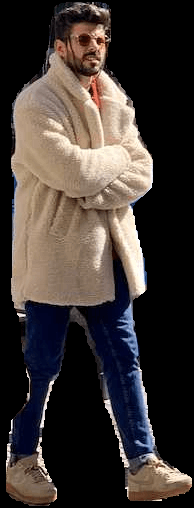
Additional steps required to crop image to only include object region.
{ align="right" }
``` { .py .annotate }
# (1) Bounding box coordinates
x1, y1, x2, y2 = c.boxes.xyxy.cpu().numpy().squeeze().astype(np.int32)
# Crop image to object region
iso_crop = isolated[y1:y2, x1:x2]
```
1. For more information on bounding box results, see [Boxes Section from Predict Mode](../modes/predict.md/#boxes)
??? question "What does this code do?"
- The `c.boxes.xyxy.cpu().numpy()` call retrieves the bounding boxes as a NumPy array in the `xyxy` format, where `xmin`, `ymin`, `xmax`, and `ymax` represent the coordinates of the bounding box rectangle. See [Boxes Section from Predict Mode](../modes/predict.md/#boxes) for more details.
- The `squeeze()` operation removes any unnecessary dimensions from the NumPy array, ensuring it has the expected shape.
- Converting the coordinate values using `.astype(np.int32)` changes the box coordinates data type from `float32` to `int32`, making them compatible for image cropping using index slices.
- Finally, the bounding box region is cropped from the image using index slicing. The bounds are defined by the `[ymin:ymax, xmin:xmax]` coordinates of the detection bounding box.
=== "Transparent Background Pixels"
```py
# Isolate object with transparent background (when saved as PNG)
isolated = np.dstack([img, b_mask])
```
??? question "How does this work?"
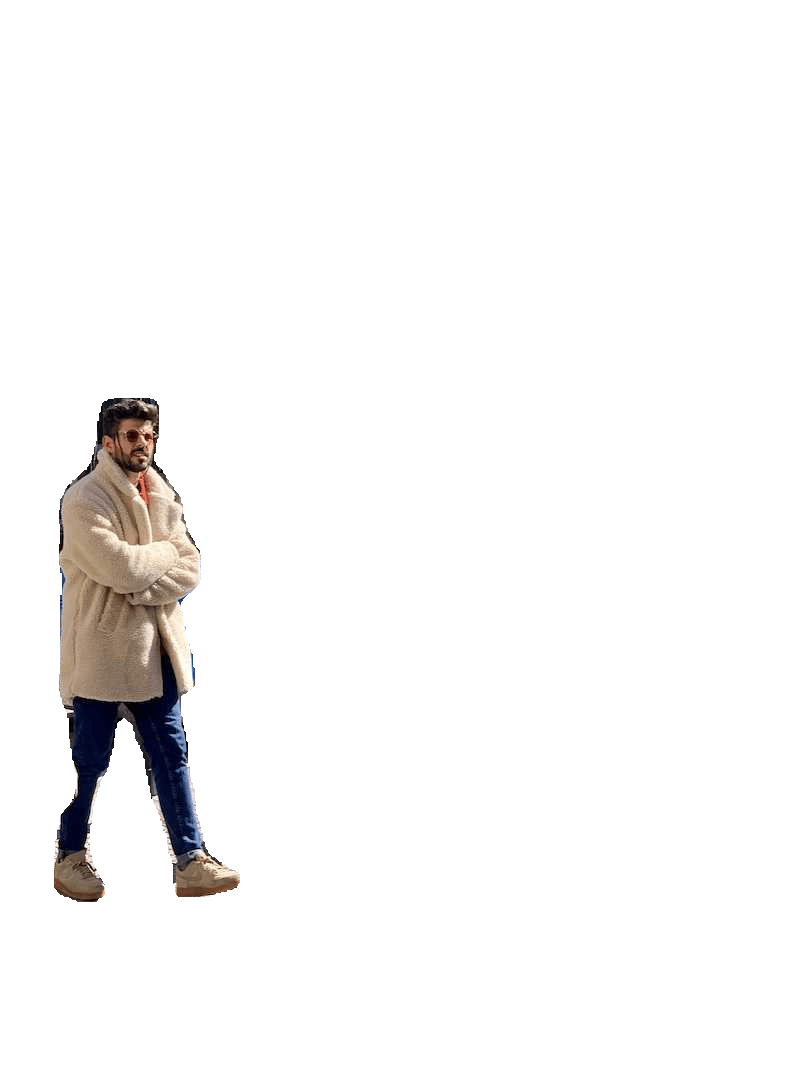
- Using the NumPy `dstack()` function (array stacking along depth-axis) in conjunction with the binary mask generated, will create an image with four channels. This allows for all pixels outside of the object contour to be transparent when saving as a `PNG` file.
### Isolate with Transparent Pixels: Sub-options
??? info "Full-size Image"
There are no additional steps required if keeping full size image.
<figure markdown>
{ width=240 }
<figcaption>Example full-size output + transparent background</figcaption>
</figure>
??? info "Cropped object Image"
Additional steps required to crop image to only include object region.
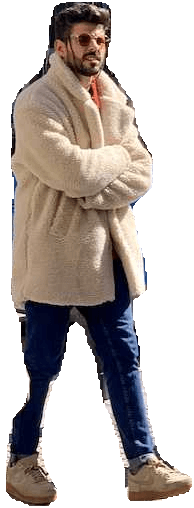{ align="right" }
``` { .py .annotate }
# (1) Bounding box coordinates
x1, y1, x2, y2 = c.boxes.xyxy.cpu().numpy().squeeze().astype(np.int32)
# Crop image to object region
iso_crop = isolated[y1:y2, x1:x2]
```
1. For more information on bounding box results, see [Boxes Section from Predict Mode](../modes/predict.md/#boxes)
??? question "What does this code do?"
- When using `c.boxes.xyxy.cpu().numpy()`, the bounding boxes are returned as a NumPy array, using the `xyxy` box coordinates format, which correspond to the points `xmin, ymin, xmax, ymax` for the bounding box (rectangle), see [Boxes Section from Predict Mode](../modes/predict.md/#boxes) for more information.
- Adding `squeeze()` ensures that any extraneous dimensions are removed from the NumPy array.
- Converting the coordinate values using `.astype(np.int32)` changes the box coordinates data type from `float32` to `int32` which will be compatible when cropping the image using index slices.
- Finally the image region for the bounding box is cropped using index slicing, where the bounds are set using the `[ymin:ymax, xmin:xmax]` coordinates of the detection bounding box.
??? question "What if I want the cropped object **including** the background?"
This is a built in feature for the Ultralytics library. See the `save_crop` argument for [Predict Mode Inference Arguments](../modes/predict.md/#inference-arguments) for details.
***
6. <u>What to do next is entirely left to you as the developer.</u> A basic example of one possible next step (saving the image to file for future use) is shown.
- **NOTE:** this step is optional and can be skipped if not required for your specific use case.
??? example "Example Final Step"
```py
# Save isolated object to file
_ = cv2.imwrite(f'{img_name}_{label}-{ci}.png', iso_crop)
```
- In this example, the `img_name` is the base-name of the source image file, `label` is the detected class-name, and `ci` is the index of the object detection (in case of multiple instances with the same class name).
## Full Example code
Here, all steps from the previous section are combined into a single block of code. For repeated use, it would be optimal to define a function to do some or all commands contained in the `for`-loops, but that is an exercise left to the reader.
```{ .py .annotate }
from pathlib import Path
import cv2
import numpy as np
from ultralytics import YOLO
m = YOLO('yolov8n-seg.pt')#(4)!
res = m.predict()#(3)!
# iterate detection results (5)
for r in res:
img = np.copy(r.orig_img)
img_name = Path(r.path).stem
# iterate each object contour (6)
for ci,c in enumerate(r):
label = c.names[c.boxes.cls.tolist().pop()]
b_mask = np.zeros(img.shape[:2], np.uint8)
# Create contour mask (1)
contour = c.masks.xy.pop().astype(np.int32).reshape(-1, 1, 2)
_ = cv2.drawContours(b_mask, [contour], -1, (255, 255, 255), cv2.FILLED)
# Choose one:
# OPTION-1: Isolate object with black background
mask3ch = cv2.cvtColor(b_mask, cv2.COLOR_GRAY2BGR)
isolated = cv2.bitwise_and(mask3ch, img)
# OPTION-2: Isolate object with transparent background (when saved as PNG)
isolated = np.dstack([img, b_mask])
# OPTIONAL: detection crop (from either OPT1 or OPT2)
x1, y1, x2, y2 = c.boxes.xyxy.cpu().numpy().squeeze().astype(np.int32)
iso_crop = isolated[y1:y2, x1:x2]
# TODO your actions go here (2)
```
1. The line populating `contour` is combined into a single line here, where it was split to multiple above.
2. {==What goes here is up to you!==}
3. See [Predict Mode](../modes/predict.md) for additional information.
4. See [Segment Task](../tasks/segment.md#models) for more information.
5. Learn more about [Working with Results](../modes/predict.md#working-with-results)
6. Learn more about [Segmentation Mask Results](../modes/predict.md#masks)
|