
File size: 5,748 Bytes
973f8ce c999e3b e56454b c999e3b e56454b c999e3b 30be932 973f8ce |
1 2 3 4 5 6 7 8 9 10 11 12 13 14 15 16 17 18 19 20 21 22 23 24 25 26 27 28 29 30 31 32 33 34 35 36 37 38 39 40 41 42 43 44 45 46 47 48 49 50 51 52 53 54 55 56 57 58 59 60 61 62 63 64 65 66 67 68 69 70 71 72 73 74 75 76 77 78 79 80 81 82 83 84 85 86 87 88 89 90 91 92 93 94 95 96 97 98 99 100 101 102 103 104 105 106 107 108 109 110 111 112 113 114 115 116 117 118 119 120 121 122 123 124 125 126 127 128 129 130 131 132 133 134 135 136 137 138 139 140 141 142 143 144 145 146 147 148 149 150 151 152 153 154 155 156 157 158 159 160 161 162 163 164 165 166 167 168 169 170 171 172 173 174 175 176 177 178 179 180 181 182 183 184 185 186 187 188 189 190 191 192 193 194 195 196 197 198 199 200 201 202 203 204 205 206 |
---
title: Panda Cat Dog Classification
emoji: ⚡
colorFrom: yellow
colorTo: purple
sdk: gradio
sdk_version: 4.15.0
app_file: app.py
pinned: false
license: mit
---
# Model Name
panda_cat_dog_classification
### Model Description
This model classifies animals among pandas, cats and dogs. It was trained using custom CNN model.
- **Developed by:** Neelima Monjusha Preeti
- **Model type:** custom CNN model
- **Language(s):** Python
- **License:** MIT
- **Contact:** [email protected]
### Task Description:
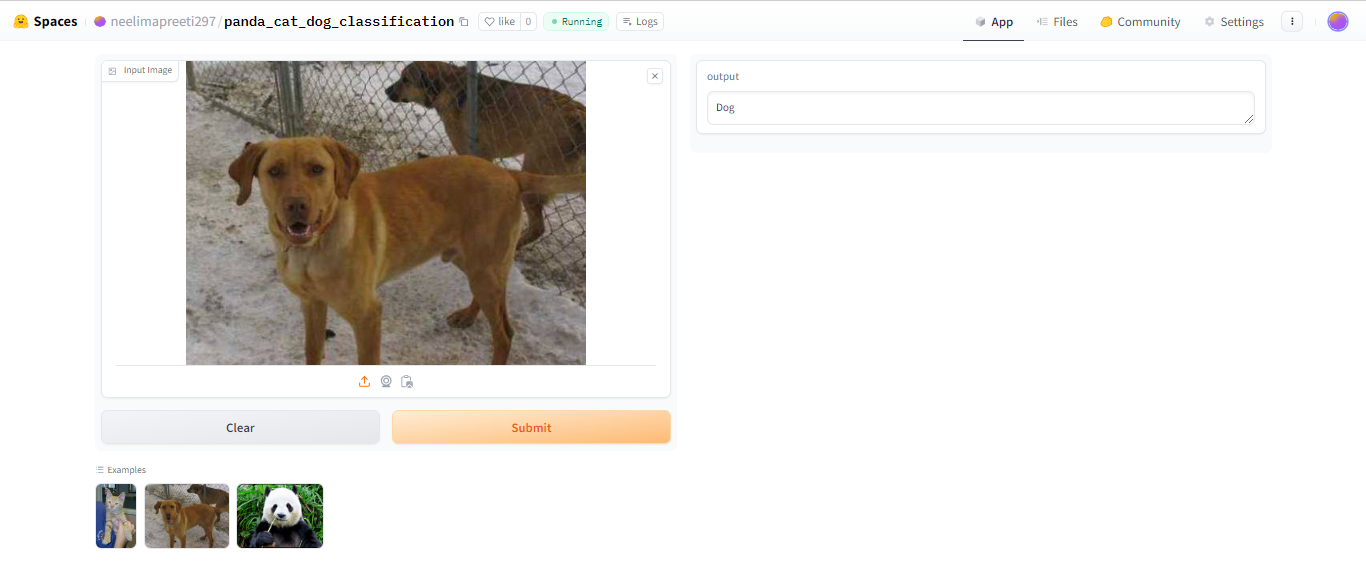
This panda_cat_dog_classification app classifies between panda, cat, or dog. So the input field is going to take input an image of one of three classes of dog, cat and panda.Then as output, it is going to show the name of the animal to which it belongs. It first processes the data and resizes it. Then custom CNN model is developed. The loss function and optimizer are calculated.
After that, the custom model is trained and tested then the app is launched using gradio in Hugging Face.
### Data Preprocessing
The image dataset is preprocessed with the following portion:
```bash
transform = transforms.Compose([
transforms.Resize((224,224)),
transforms.ToTensor(),
transforms.Normalize((0.485,0.456,0.406),(0.229,0.224,0.225))
])
```
transforms.Resize((224,224)) resizes the input image to (224, 224) pixels.
transforms.ToTensor() converts the input image into a PyTorch tensor. Neural networks typically operate on tensors, so this transformation converts the image into a format suitable for further processing.
transforms.Normalize(()) normalizes the tensor image with mean and standard deviation. The values provided are mean and standard deviation values for each channel in the tensor.
### Model Architecture
The model was trained with custom CNN() model. this CNN architecture consists of two convolutional layers followed by two fully connected layers, and it is designed for a classification task with three classes.
```bash
class CNN(nn.Module):
def __init__(self):
super(CNN, self).__init__()
self.conv1 = nn.Conv2d(3, 6, 5)
self.conv2 = nn.Conv2d(6, 16, 5)
self.pool = nn.MaxPool2d(2, 2)
self.fc1 = nn.Linear(16 * 53 * 53, 120)
self.fc2 = nn.Linear(120, 84)
self.fc3 = nn.Linear(84, 3)
def forward(self, x):
x = self.conv1(x)
x = self.pool(x)
x = self.conv2(x)
x = self.pool(x)
x = x.view(-1, 16 * 53 * 53)
x = self.fc1(x)
x = self.fc2(x)
x = self.fc3(x)
return x
```
Then used batch_size = 8 and CrossEntropyLoss() for loss function. Then used Adam optimizer with a learning rate 0.001 for optimization process.
```bash
loss_function = nn.CrossEntropyLoss()
optimizer = optim.Adam(model.parameters(), lr=0.001)
```
### Training Loop
Loading the data then breaking it into mini batches. Then forward pass and loss function calculation. After that backward propagation and optimization.
Backward Propagation and Optimization:
```bash
optimizer.zero_grad()
loss.backward()
optimizer.step()
```
### Test data
Test data loaded and calculate the accuracy.
The accuracy was 53.333333333333336% .
### Result Analysis
The packages needed for creating the huggingface interface is loaded with:
```bash
import gradio as gr
import torch
from torchvision import transforms
```
The model was saved with the following:
```bash
model_scripted = torch.jit.script(model)
model_scripted.save('./models/cat_dog_cnn.pt')
```
## HuggingFace Result analysis
First the custom model cat_dog_cnn.pt is loaded. Then the output function is specified. As this is a Image Classification model.
```bash
|---app_data
| |---cat.jpg
| |---dog.jpg
| |---panda.jpg
|
```
Example images are loaded.
The classes for prediction are - CLASSES = ["Cat", "Dog", "Panda"].
The output function for prediction is
```bash
def classify_image(inp):
inp = transform(inp).unsqueeze(0)
out = model(inp)
return CLASSES[out.argmax().item()]
```
This will return the classes of the input image.
# Interface Creation
For creating huggingface interface this following portion is added:
```bash
iface = gr.Interface(fn=classify_image,
inputs=gr.Image(type="pil", label="Input Image"),
outputs="text",
examples=[
"./app_data/cat.jpg",
"./app_data/dog.jpg",
"./app_data/panda.jpg",
])
```
This portion is going to create an interface for taking the image input. Then example images and output is defined to be the classes from cat, dog and panda.
Now with the following the interface of the app is loaded.
```bash
iface.launch()
```
### Project Structure
```bash
|
|---app_data
| |---images(used for examples)
|
|---models
| |---cat_dog_cnn.pt
|
|---train(image dataset for training)
|
|---test(image dataset for testing)
|
|---Readme.md(about project)
|
|---app.py(the interface for project)
|
|---requirements.txt(libraries needed for project)
|
|---main.ipynb(project code)
```
### How to Run
```bash
git clone https://huggingface.co/spaces/neelimapreeti297/panda_cat_dog_classification/tree/main
cd panda_cat_dog_classification
pip install -r requirements.txt
python app.py
```
### License
This project is licensed under the MIT License.
### Contributor
Neelima Monjusha Preeti - [email protected]
App link: https://huggingface.co/spaces/neelimapreeti297/panda_cat_dog_classification
|