
| <!--Copyright 2023 The HuggingFace Team. All rights reserved. | |
| Licensed under the Apache License, Version 2.0 (the "License"); you may not use this file except in compliance with | |
| the License. You may obtain a copy of the License at | |
| http://www.apache.org/licenses/LICENSE-2.0 | |
| Unless required by applicable law or agreed to in writing, software distributed under the License is distributed on | |
| an "AS IS" BASIS, WITHOUT WARRANTIES OR CONDITIONS OF ANY KIND, either express or implied. See the License for the | |
| specific language governing permissions and limitations under the License. | |
| --> | |
| # Kandinsky 2.2 | |
| The Kandinsky 2.2 release includes robust new text-to-image models that support text-to-image generation, image-to-image generation, image interpolation, and text-guided image inpainting. The general workflow to perform these tasks using Kandinsky 2.2 is the same as in Kandinsky 2.1. First, you will need to use a prior pipeline to generate image embeddings based on your text prompt, and then use one of the image decoding pipelines to generate the output image. The only difference is that in Kandinsky 2.2, all of the decoding pipelines no longer accept the `prompt` input, and the image generation process is conditioned with only `image_embeds` and `negative_image_embeds`. | |
| Same as with Kandinsky 2.1, the easiest way to perform text-to-image generation is to use the combined Kandinsky pipeline. This process is exactly the same as Kandinsky 2.1. All you need to do is to replace the Kandinsky 2.1 checkpoint with 2.2. | |
| ```python | |
| from diffusers import AutoPipelineForText2Image | |
| import torch | |
| pipe = AutoPipelineForText2Image.from_pretrained("kandinsky-community/kandinsky-2-2-decoder", torch_dtype=torch.float16) | |
| pipe.enable_model_cpu_offload() | |
| prompt = "A alien cheeseburger creature eating itself, claymation, cinematic, moody lighting" | |
| negative_prompt = "low quality, bad quality" | |
| image = pipe(prompt=prompt, negative_prompt=negative_prompt, prior_guidance_scale =1.0, height=768, width=768).images[0] | |
| ``` | |
| Now, let's look at an example where we take separate steps to run the prior pipeline and text-to-image pipeline. This way, we can understand what's happening under the hood and how Kandinsky 2.2 differs from Kandinsky 2.1. | |
| First, let's create the prior pipeline and text-to-image pipeline with Kandinsky 2.2 checkpoints. | |
| ```python | |
| from diffusers import DiffusionPipeline | |
| import torch | |
| pipe_prior = DiffusionPipeline.from_pretrained("kandinsky-community/kandinsky-2-2-prior", torch_dtype=torch.float16) | |
| pipe_prior.to("cuda") | |
| t2i_pipe = DiffusionPipeline.from_pretrained("kandinsky-community/kandinsky-2-2-decoder", torch_dtype=torch.float16) | |
| t2i_pipe.to("cuda") | |
| ``` | |
| You can then use `pipe_prior` to generate image embeddings. | |
| ```python | |
| prompt = "portrait of a women, blue eyes, cinematic" | |
| negative_prompt = "low quality, bad quality" | |
| image_embeds, negative_image_embeds = pipe_prior(prompt, guidance_scale=1.0).to_tuple() | |
| ``` | |
| Now you can pass these embeddings to the text-to-image pipeline. When using Kandinsky 2.2 you don't need to pass the `prompt` (but you do with the previous version, Kandinsky 2.1). | |
| ``` | |
| image = t2i_pipe(image_embeds=image_embeds, negative_image_embeds=negative_image_embeds, height=768, width=768).images[ | |
| 0 | |
| ] | |
| image.save("portrait.png") | |
| ``` | |
| 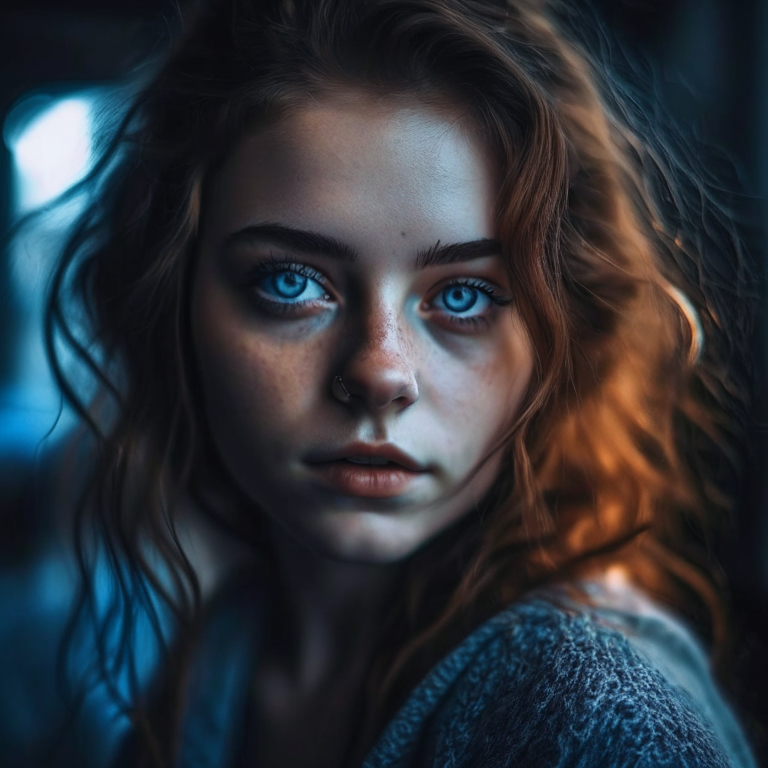 | |
| We used the text-to-image pipeline as an example, but the same process applies to all decoding pipelines in Kandinsky 2.2. For more information, please refer to our API section for each pipeline. | |
| ### Text-to-Image Generation with ControlNet Conditioning | |
| In the following, we give a simple example of how to use [`KandinskyV22ControlnetPipeline`] to add control to the text-to-image generation with a depth image. | |
| First, let's take an image and extract its depth map. | |
| ```python | |
| from diffusers.utils import load_image | |
| img = load_image( | |
| "https://huggingface.co/datasets/hf-internal-testing/diffusers-images/resolve/main/kandinskyv22/cat.png" | |
| ).resize((768, 768)) | |
| ``` | |
|  | |
| We can use the `depth-estimation` pipeline from transformers to process the image and retrieve its depth map. | |
| ```python | |
| import torch | |
| import numpy as np | |
| from transformers import pipeline | |
| from diffusers.utils import load_image | |
| def make_hint(image, depth_estimator): | |
| image = depth_estimator(image)["depth"] | |
| image = np.array(image) | |
| image = image[:, :, None] | |
| image = np.concatenate([image, image, image], axis=2) | |
| detected_map = torch.from_numpy(image).float() / 255.0 | |
| hint = detected_map.permute(2, 0, 1) | |
| return hint | |
| depth_estimator = pipeline("depth-estimation") | |
| hint = make_hint(img, depth_estimator).unsqueeze(0).half().to("cuda") | |
| ``` | |
| Now, we load the prior pipeline and the text-to-image controlnet pipeline | |
| ```python | |
| from diffusers import KandinskyV22PriorPipeline, KandinskyV22ControlnetPipeline | |
| pipe_prior = KandinskyV22PriorPipeline.from_pretrained( | |
| "kandinsky-community/kandinsky-2-2-prior", torch_dtype=torch.float16 | |
| ) | |
| pipe_prior = pipe_prior.to("cuda") | |
| pipe = KandinskyV22ControlnetPipeline.from_pretrained( | |
| "kandinsky-community/kandinsky-2-2-controlnet-depth", torch_dtype=torch.float16 | |
| ) | |
| pipe = pipe.to("cuda") | |
| ``` | |
| We pass the prompt and negative prompt through the prior to generate image embeddings | |
| ```python | |
| prompt = "A robot, 4k photo" | |
| negative_prior_prompt = "lowres, text, error, cropped, worst quality, low quality, jpeg artifacts, ugly, duplicate, morbid, mutilated, out of frame, extra fingers, mutated hands, poorly drawn hands, poorly drawn face, mutation, deformed, blurry, dehydrated, bad anatomy, bad proportions, extra limbs, cloned face, disfigured, gross proportions, malformed limbs, missing arms, missing legs, extra arms, extra legs, fused fingers, too many fingers, long neck, username, watermark, signature" | |
| generator = torch.Generator(device="cuda").manual_seed(43) | |
| image_emb, zero_image_emb = pipe_prior( | |
| prompt=prompt, negative_prompt=negative_prior_prompt, generator=generator | |
| ).to_tuple() | |
| ``` | |
| Now we can pass the image embeddings and the depth image we extracted to the controlnet pipeline. With Kandinsky 2.2, only prior pipelines accept `prompt` input. You do not need to pass the prompt to the controlnet pipeline. | |
| ```python | |
| images = pipe( | |
| image_embeds=image_emb, | |
| negative_image_embeds=zero_image_emb, | |
| hint=hint, | |
| num_inference_steps=50, | |
| generator=generator, | |
| height=768, | |
| width=768, | |
| ).images | |
| images[0].save("robot_cat.png") | |
| ``` | |
| The output image looks as follow: | |
| 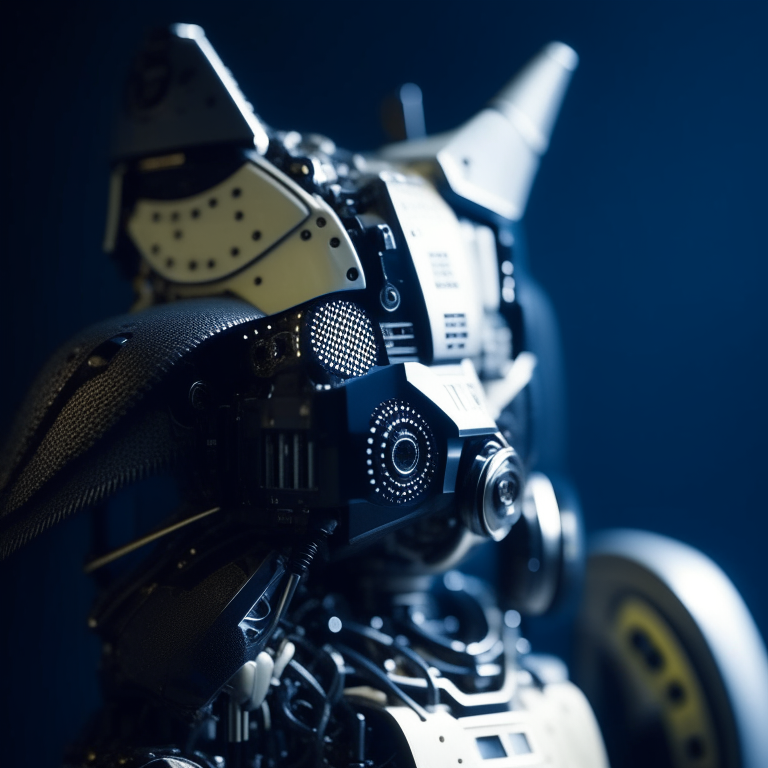 | |
| ### Image-to-Image Generation with ControlNet Conditioning | |
| Kandinsky 2.2 also includes a [`KandinskyV22ControlnetImg2ImgPipeline`] that will allow you to add control to the image generation process with both the image and its depth map. This pipeline works really well with [`KandinskyV22PriorEmb2EmbPipeline`], which generates image embeddings based on both a text prompt and an image. | |
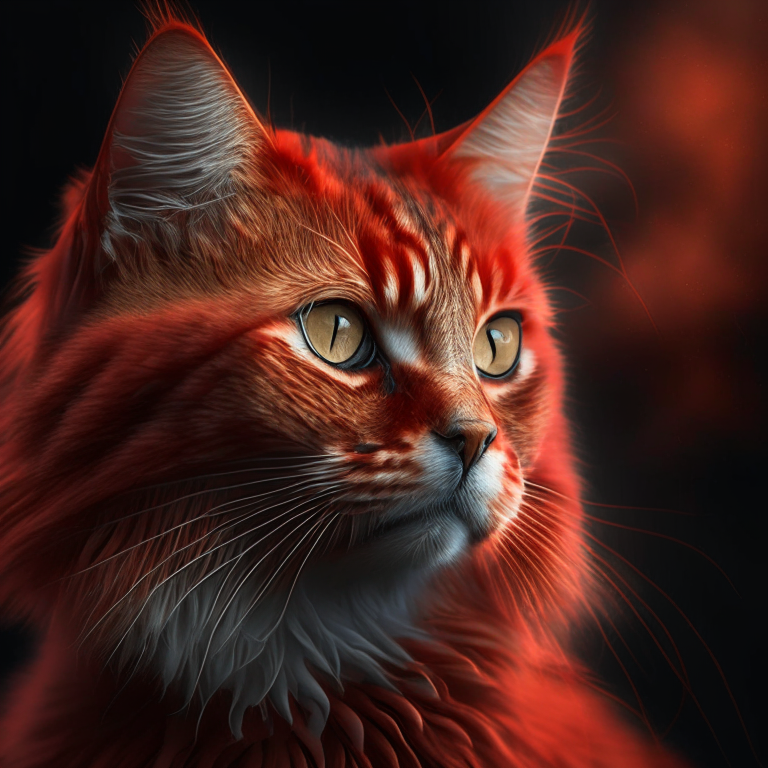
| For our robot cat example, we will pass the prompt and cat image together to the prior pipeline to generate an image embedding. We will then use that image embedding and the depth map of the cat to further control the image generation process. | |
| We can use the same cat image and its depth map from the last example. | |
| ```python | |
| import torch | |
| import numpy as np | |
| from diffusers import KandinskyV22PriorEmb2EmbPipeline, KandinskyV22ControlnetImg2ImgPipeline | |
| from diffusers.utils import load_image | |
| from transformers import pipeline | |
| img = load_image( | |
| "https://huggingface.co/datasets/hf-internal-testing/diffusers-images/resolve/main" "/kandinskyv22/cat.png" | |
| ).resize((768, 768)) | |
| def make_hint(image, depth_estimator): | |
| image = depth_estimator(image)["depth"] | |
| image = np.array(image) | |
| image = image[:, :, None] | |
| image = np.concatenate([image, image, image], axis=2) | |
| detected_map = torch.from_numpy(image).float() / 255.0 | |
| hint = detected_map.permute(2, 0, 1) | |
| return hint | |
| depth_estimator = pipeline("depth-estimation") | |
| hint = make_hint(img, depth_estimator).unsqueeze(0).half().to("cuda") | |
| pipe_prior = KandinskyV22PriorEmb2EmbPipeline.from_pretrained( | |
| "kandinsky-community/kandinsky-2-2-prior", torch_dtype=torch.float16 | |
| ) | |
| pipe_prior = pipe_prior.to("cuda") | |
| pipe = KandinskyV22ControlnetImg2ImgPipeline.from_pretrained( | |
| "kandinsky-community/kandinsky-2-2-controlnet-depth", torch_dtype=torch.float16 | |
| ) | |
| pipe = pipe.to("cuda") | |
| prompt = "A robot, 4k photo" | |
| negative_prior_prompt = "lowres, text, error, cropped, worst quality, low quality, jpeg artifacts, ugly, duplicate, morbid, mutilated, out of frame, extra fingers, mutated hands, poorly drawn hands, poorly drawn face, mutation, deformed, blurry, dehydrated, bad anatomy, bad proportions, extra limbs, cloned face, disfigured, gross proportions, malformed limbs, missing arms, missing legs, extra arms, extra legs, fused fingers, too many fingers, long neck, username, watermark, signature" | |
| generator = torch.Generator(device="cuda").manual_seed(43) | |
| # run prior pipeline | |
| img_emb = pipe_prior(prompt=prompt, image=img, strength=0.85, generator=generator) | |
| negative_emb = pipe_prior(prompt=negative_prior_prompt, image=img, strength=1, generator=generator) | |
| # run controlnet img2img pipeline | |
| images = pipe( | |
| image=img, | |
| strength=0.5, | |
| image_embeds=img_emb.image_embeds, | |
| negative_image_embeds=negative_emb.image_embeds, | |
| hint=hint, | |
| num_inference_steps=50, | |
| generator=generator, | |
| height=768, | |
| width=768, | |
| ).images | |
| images[0].save("robot_cat.png") | |
| ``` | |
| Here is the output. Compared with the output from our text-to-image controlnet example, it kept a lot more cat facial details from the original image and worked into the robot style we asked for. | |
|  | |
| ## Optimization | |
| Running Kandinsky in inference requires running both a first prior pipeline: [`KandinskyPriorPipeline`] | |
| and a second image decoding pipeline which is one of [`KandinskyPipeline`], [`KandinskyImg2ImgPipeline`], or [`KandinskyInpaintPipeline`]. | |
| The bulk of the computation time will always be the second image decoding pipeline, so when looking | |
| into optimizing the model, one should look into the second image decoding pipeline. | |
| When running with PyTorch < 2.0, we strongly recommend making use of [`xformers`](https://github.com/facebookresearch/xformers) | |
| to speed-up the optimization. This can be done by simply running: | |
| ```py | |
| from diffusers import DiffusionPipeline | |
| import torch | |
| t2i_pipe = DiffusionPipeline.from_pretrained("kandinsky-community/kandinsky-2-1", torch_dtype=torch.float16) | |
| t2i_pipe.enable_xformers_memory_efficient_attention() | |
| ``` | |
| When running on PyTorch >= 2.0, PyTorch's SDPA attention will automatically be used. For more information on | |
| PyTorch's SDPA, feel free to have a look at [this blog post](https://pytorch.org/blog/accelerated-diffusers-pt-20/). | |
| To have explicit control , you can also manually set the pipeline to use PyTorch's 2.0 efficient attention: | |
| ```py | |
| from diffusers.models.attention_processor import AttnAddedKVProcessor2_0 | |
| t2i_pipe.unet.set_attn_processor(AttnAddedKVProcessor2_0()) | |
| ``` | |
| The slowest and most memory intense attention processor is the default `AttnAddedKVProcessor` processor. | |
| We do **not** recommend using it except for testing purposes or cases where very high determistic behaviour is desired. | |
| You can set it with: | |
| ```py | |
| from diffusers.models.attention_processor import AttnAddedKVProcessor | |
| t2i_pipe.unet.set_attn_processor(AttnAddedKVProcessor()) | |
| ``` | |
| With PyTorch >= 2.0, you can also use Kandinsky with `torch.compile` which depending | |
| on your hardware can signficantly speed-up your inference time once the model is compiled. | |
| To use Kandinsksy with `torch.compile`, you can do: | |
| ```py | |
| t2i_pipe.unet.to(memory_format=torch.channels_last) | |
| t2i_pipe.unet = torch.compile(t2i_pipe.unet, mode="reduce-overhead", fullgraph=True) | |
| ``` | |
| After compilation you should see a very fast inference time. For more information, | |
| feel free to have a look at [Our PyTorch 2.0 benchmark](https://huggingface.co/docs/diffusers/main/en/optimization/torch2.0). | |
| <Tip> | |
| To generate images directly from a single pipeline, you can use [`KandinskyV22CombinedPipeline`], [`KandinskyV22Img2ImgCombinedPipeline`], [`KandinskyV22InpaintCombinedPipeline`]. | |
| These combined pipelines wrap the [`KandinskyV22PriorPipeline`] and [`KandinskyV22Pipeline`], [`KandinskyV22Img2ImgPipeline`], [`KandinskyV22InpaintPipeline`] respectively into a single | |
| pipeline for a simpler user experience | |
| </Tip> | |
| ## Available Pipelines: | |
| | Pipeline | Tasks | | |
| |---|---| | |
| | [pipeline_kandinsky2_2.py](https://github.com/huggingface/diffusers/blob/main/src/diffusers/pipelines/kandinsky2_2/pipeline_kandinsky2_2.py) | *Text-to-Image Generation* | | |
| | [pipeline_kandinsky2_2_combined.py](https://github.com/huggingface/diffusers/blob/main/src/diffusers/pipelines/kandinsky2_2/pipeline_kandinsky2_2_combined.py) | *End-to-end Text-to-Image, image-to-image, Inpainting Generation* | | |
| | [pipeline_kandinsky2_2_inpaint.py](https://github.com/huggingface/diffusers/blob/main/src/diffusers/pipelines/kandinsky2_2/pipeline_kandinsky2_2_inpaint.py) | *Image-Guided Image Generation* | | |
| | [pipeline_kandinsky2_2_img2img.py](https://github.com/huggingface/diffusers/blob/main/src/diffusers/pipelines/kandinsky2_2/pipeline_kandinsky2_2_img2img.py) | *Image-Guided Image Generation* | | |
| | [pipeline_kandinsky2_2_controlnet.py](https://github.com/huggingface/diffusers/blob/main/src/diffusers/pipelines/kandinsky2_2/pipeline_kandinsky2_2_controlnet.py) | *Image-Guided Image Generation* | | |
| | [pipeline_kandinsky2_2_controlnet_img2img.py](https://github.com/huggingface/diffusers/blob/main/src/diffusers/pipelines/kandinsky2_2/pipeline_kandinsky2_2_controlnet_img2img.py) | *Image-Guided Image Generation* | | |
| ### KandinskyV22Pipeline | |
| [[autodoc]] KandinskyV22Pipeline | |
| - all | |
| - __call__ | |
| ### KandinskyV22ControlnetPipeline | |
| [[autodoc]] KandinskyV22ControlnetPipeline | |
| - all | |
| - __call__ | |
| ### KandinskyV22ControlnetImg2ImgPipeline | |
| [[autodoc]] KandinskyV22ControlnetImg2ImgPipeline | |
| - all | |
| - __call__ | |
| ### KandinskyV22Img2ImgPipeline | |
| [[autodoc]] KandinskyV22Img2ImgPipeline | |
| - all | |
| - __call__ | |
| ### KandinskyV22InpaintPipeline | |
| [[autodoc]] KandinskyV22InpaintPipeline | |
| - all | |
| - __call__ | |
| ### KandinskyV22PriorPipeline | |
| [[autodoc]] KandinskyV22PriorPipeline | |
| - all | |
| - __call__ | |
| - interpolate | |
| ### KandinskyV22PriorEmb2EmbPipeline | |
| [[autodoc]] KandinskyV22PriorEmb2EmbPipeline | |
| - all | |
| - __call__ | |
| - interpolate | |
| ### KandinskyV22CombinedPipeline | |
| [[autodoc]] KandinskyV22CombinedPipeline | |
| - all | |
| - __call__ | |
| ### KandinskyV22Img2ImgCombinedPipeline | |
| [[autodoc]] KandinskyV22Img2ImgCombinedPipeline | |
| - all | |
| - __call__ | |
| ### KandinskyV22InpaintCombinedPipeline | |
| [[autodoc]] KandinskyV22InpaintCombinedPipeline | |
| - all | |
| - __call__ | |