Spaces:
Runtime error
Runtime error
| # Zero-shot Image Classification with SigLIP | |
| [](https://colab.research.google.com/github/openvinotoolkit/openvino_notebooks/blob/latest/notebooks/siglip-zero-shot-image-classification/siglip-zero-shot-image-classification.ipynb) | |
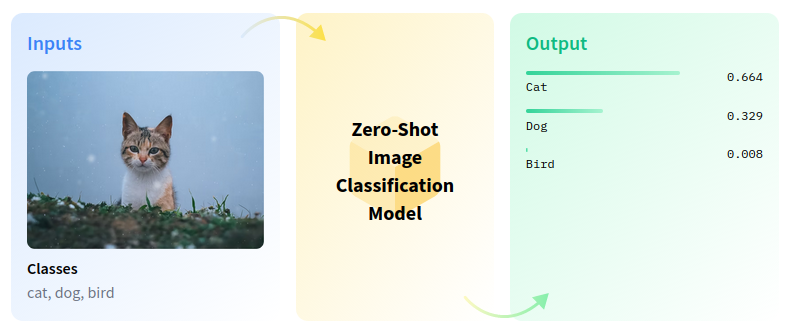
| Zero-shot image classification is a computer vision task with the goal to classify images into one of several classes without any prior training or knowledge of these classes. | |
|  | |
| In this tutorial, you will use the [SigLIP](https://huggingface.co/docs/transformers/main/en/model_doc/siglip) model to perform zero-shot image classification. | |
| ## Notebook Contents | |
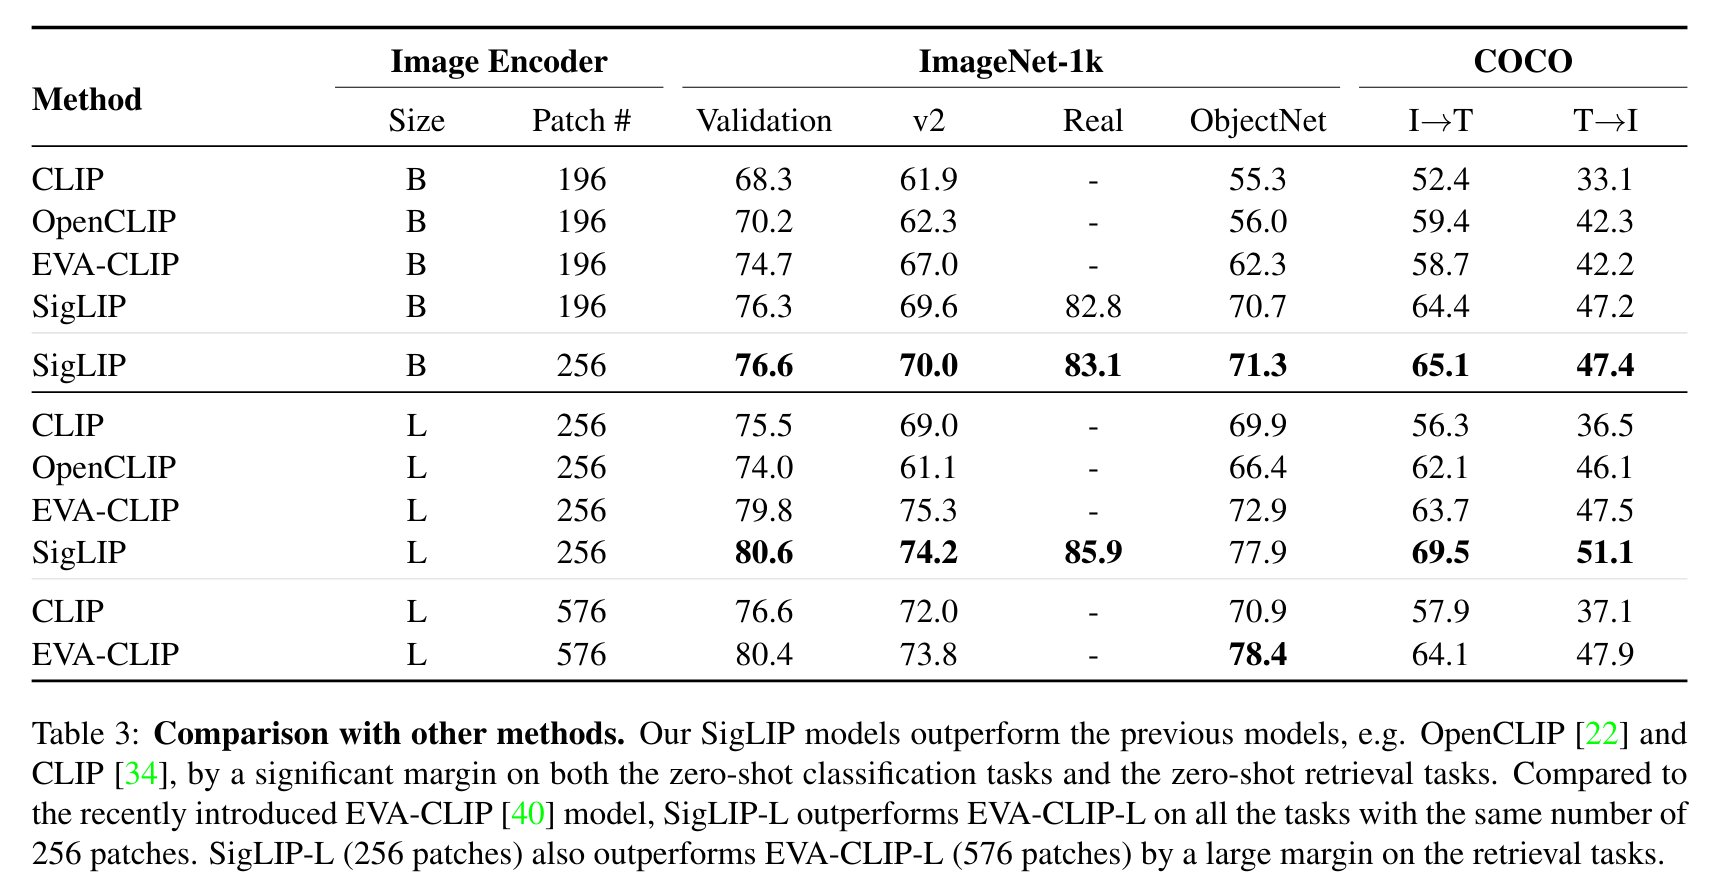
| This tutorial demonstrates how to perform zero-shot image classification using the open-source SigLIP model. The SigLIP model was proposed in the [Sigmoid Loss for Language Image Pre-Training](https://arxiv.org/abs/2303.15343) paper. SigLIP suggests replacing the loss function used in [CLIP](https://github.com/openai/CLIP) (Contrastive Language–Image Pre-training) with a simple pairwise sigmoid loss. This results in better performance in terms of zero-shot classification accuracy on ImageNet. | |
|  | |
| [\*_image source_](https://arxiv.org/abs/2303.15343) | |
| You can find more information about this model in the [research paper](https://arxiv.org/abs/2303.15343), [GitHub repository](https://github.com/google-research/big_vision), [Hugging Face model page](https://huggingface.co/docs/transformers/main/en/model_doc/siglip). | |
| The notebook contains the following steps: | |
| 1. Instantiate model. | |
| 1. Run PyTorch model inference. | |
| 1. Convert the model to OpenVINO Intermediate Representation (IR) format. | |
| 1. Run OpenVINO model. | |
| 1. Apply post-training quantization using [NNCF](https://github.com/openvinotoolkit/nncf): | |
| 1. Prepare dataset. | |
| 1. Quantize model. | |
| 1. Run quantized OpenVINO model. | |
| 1. Compare File Size. | |
| 1. Compare inference time of the FP16 IR and quantized models. | |
| The results of the SigLIP model's performance in zero-shot image classification from this notebook are demonstrated in the image below. | |
|  | |
| ## Installation Instructions | |
| This is a self-contained example that relies solely on its own code.</br> | |
| We recommend running the notebook in a virtual environment. You only need a Jupyter server to start. | |
| For details, please refer to [Installation Guide](../../README.md). | |